March 06, 2025
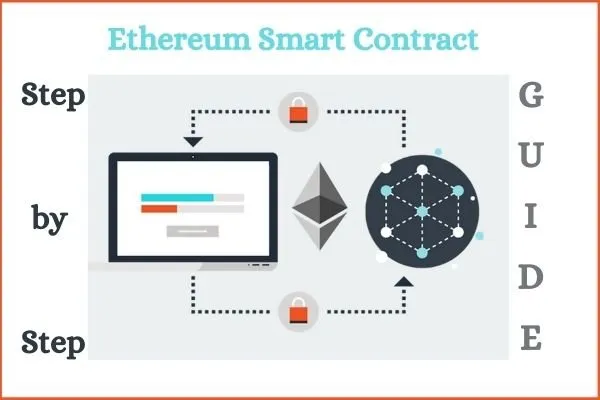
Deploying a Smart Contract on a Test Ethereum Network: A Step-by-Step Guide

Have you ever wondered how dApps (decentralized applications) function or how to design and test a smart contract before deploying it on Ethereum? You are at the correct spot! The decentralized web relies on smart contracts for trustless, automated transactions. This blog post will show you how to code a small smart contract in Solidity, deploy it on Remix, and test it on Ropsten without using Ethereum!
What is a Smart Contract?
A smart contract is a self-executing contract with coded buyer-seller terms. Once implemented, Ethereum blockchain contracts are immutable. Smart contracts automate tasks, eliminating middlemen and errors.
A simple contract saves and retrieves a value. This contract describes Ethereum's Solidity computer language and how it works with other languages.
Prerequisites for Deployment
Before we start developing and deploying, make sure you have everything you need:
- Solidity Basics: Familiarity with programming ideas is helpful, but not required.
- Remix IDE: A browser-based Solidity editor for contract writing, compiling, and deployment. User-friendly and easy.
- MetaMask Wallet: Through a browser application, it gives you access to the Ethereum network and smart contracts.
- Ropsten Testnet: A free Ethereum test network that simulates the main network. It is ideal for contract testing without ETH.
After installing MetaMask and connecting it to Ropsten, use a faucet to receive test ETH (search for "Ropsten faucet" for free tokens). You may now begin!
Writing a Simple Smart Contract
We can create a basic smart contract now that we have the tools. Let's design a contract to store and retrieve an integer value.
// SPDX-License-Identifier: MIT
pragma solidity ^0.8.0;

contract SimpleStorage {
    uint256 public storedValue;

    // Function to set a value
    function setValue(uint256 _value) public {
        storedValue = _value;
    }

    // Function to get the stored value
    function getValue() public view returns (uint256) {
        return storedValue;
    }
}
Explanation of the Contract:
The line pragma solidity ^0.8.0; defines the used version of Solidity for the smart contract. The smart contract SimpleStorage is defined by the contract SimpleStorage {...} expression. In this contract, uint256 public storedValue may hold an integer. Users may set storedValue with an integer using setValue(uint256 _value). Finally, getValue() returns the current value of storedValue, allowing blockchain users to access the integer.
Deploying to Remix IDE
The powerful Solidity IDE Remix will deploy this contract.
- Launch Remix IDE in your browser.
- Click the (+) icon on the left sidebar and name the file SimpleStorage.sol to generate a new file.
- Copy and paste the smart contract code into the file.
- To compile the contract, choose the (Solidity Compiler) tab in Remix and click (Compile). Remix highlights mistakes.
- To resolve compilation issues, verify that the Solidity version in the code is compatible with Remix's compiler.
When your contract compiles, you may deploy!
Deploying on the Ropsten Testnet
Now that your contract is ready, let's deploy it to the Ropsten testnet.
Connect MetaMask to Remix:
Start MetaMask and pick Ropsten from the network menu. After connecting, go to Remix's (Deploy & Run Transactions) tab. Select (Injected Web3) from the Environment option in this tab. You may deploy your smart contract straight to the Ropsten testnet by linking Remix to your MetaMask wallet.
Deploy the Contract:
Choose SimpleStorage to start your contract. Select the contract in Remix and click "Deploy." For this steps MetaMask requires transaction evidence; to verify and approve the transaction in MetaMask before transmitting to Ethereum. And once the confirmation completes, Remix displays the contract's testnet address.
Confirm Deployment:
Once you have confirmed the transaction in MetaMask, you need to wait for the blockchain to process it. The network's workload could make this take longer. Remix displays your deployed contract address after transaction confirmation. This address is your blockchain contract's unique identification, which you may use to communicate with or validate it on Etherscan.
Interacting with the Deployed Contract
After deployment, Remix lets you communicate with your contract.
- Use Functions: Locate setValue and getValue in the (Deployed Contracts) section of Remix.
- Set a Value: Enter a value (e.g., 42) in the setValue box and click transact. MetaMask requires transaction confirmation.
- Get the Value: Click the getValue button to obtain the saved value after mining the transaction.
Proof that your smart contract works is that it saved and retrieved the value you entered.
Conclusion
Congratulations! Successfully installed Ethereum testnet smart contract. This stage is critical to decentralized application development. Before spending actual ETH on the mainnet, test your smart contracts on Ropsten. You can now investigate more complicated smart contracts and deploy them on the Ethereum mainnet after understanding the fundamentals.
1.3k views